Edit 13June2018: also check out our 3D print projects on risley.net.
First Attempt
Neither Josh nor Matthew are particularly materialistic, and coming up with Christmas and birthday gifts can be challenging. When I asked Matthew back in 2015 what he wanted for Christmas, he asked how much an inexpensive 3D printer might cost. Though I’ve been interested in 3D printing technology, I hadn’t really had the spare time and money to get into it. I did some investigating, though, and discovered that there were kits available in the under-$300 range that got some pretty good ratings.
I got a generic 3D printer kit for Matthew for Christmas. It was a fun father-son bonding experience getting it all assembled, with Matthew doing about 90% of the work. When it came to actually printing, though, it turned out to be a lot more challenging than expected.
Part of the problem was the kit itself. They cut just a few too many corners, such as expecting machine screws to self-tap into laser-cut masonite. Fine if you’re just trying to keep things aligned, but they used the same shortcut for some high-torque applications, such as clamps that had to hold precision belts in place. As soon as we started printing, many of the screws stripped out. We replaced a lot of the parts with much more appropriate hardware (nuts instead of just threading into little more than cardboard) and got the printer more-or-less working.
More or less.
Ultimately, the problem turned out that there were just too many variables. The instructions were sparse at best, but often it was clear that design changes had been made (some major) but the instructions hadn’t been updated. There were many adjustments to be made, but little guidance on how to make them or how to tell if you’ve made them correctly. The software was even tougher to deal with. I use a lot of free and open-source software, and I’m well used to using programs where the only documentation is provided by the community, but for 3D printing there are just too many different programs and too many settings. When a print didn’t work, was it the slicer? The machine-specific settings? The USB interface? The physical adjustments on the printer itself?
It’s also important to anticipate that most prints will take hours, and the kit we had required a continuous connection to the computer which had to remain responsive. Matthew really didn’t like the idea of giving up the use of his computer for four to eight hours at a time. We managed a few prints, but nothing particularly pretty. We had many frustrating failures. In the end, the kit mostly sat gathering dust. This was particularly unsatisfying as the printer was unsightly but tethered to the computer, so it occupied our living space.
Two Point Zero
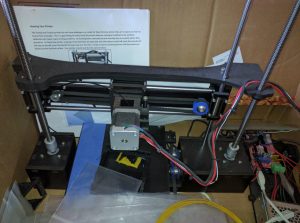
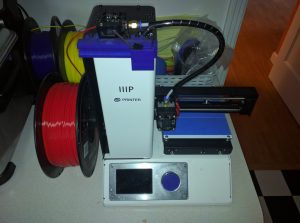
When Christmas was rolling around again, I thought it might be good to take another stab at 3D printing. Santa brought the family a Monoprice Mini 3D printer![]() , a re-branded Malyan M200. It’s small, with only a 12x12x12cm print area, but it comes assembled and ready-to-run for $200 delivered.
, a re-branded Malyan M200. It’s small, with only a 12x12x12cm print area, but it comes assembled and ready-to-run for $200 delivered.
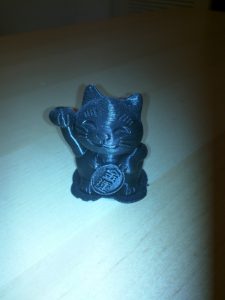
Unlike the kit, it came with simple but precise instructions for leveling the bed. It has a heated bed which has eliminated the frustrating first-layer problems we had with the kit. It is designed for offline printing from a micro-SD card. Even better, the included micro-SD card has a ready-to-print file to make a little lucky cat, so you can do your first print before trying to tackle installation and configuration of slicer software. They don’t include enough filament to print the cat, but we had already purchased a spool for the kit. Within a few hours of opening the box, we had our first charming little print. That went a long way toward diminishing the anxiety I had developed around trying to make the 3D printer work.
What Next?
3D printing seemed to offer infinite promise so, after the lucky cat, what next? The family seemed enamored of the kitty, but it didn’t seem as though the highest and best use of 3D printing technology was filling the house with cute little tchotchkes.
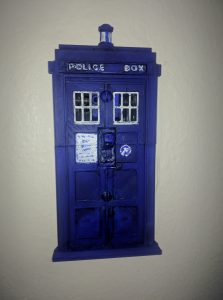
But a trip to Thingiverse![]() revealed that there were still some had-to-have knick-knacks, such as this TARDIS switchplate (had to print it in two pieces to fit the Monoprice Mini; painting by Helen)
revealed that there were still some had-to-have knick-knacks, such as this TARDIS switchplate (had to print it in two pieces to fit the Monoprice Mini; painting by Helen)
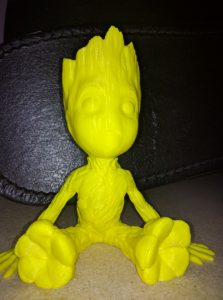
and this adorable Baby Groot (pending painting):
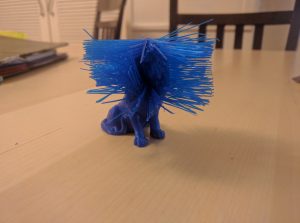
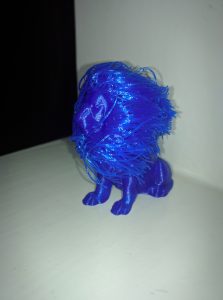
and this lion, where the mane is printed as a series of straight filaments which are then styled with a blow-dryer after printing and cutting away the supporting cylinder:

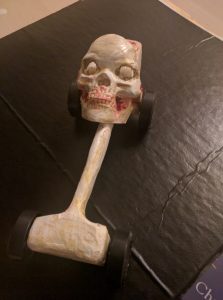
A touch more practical was an adornment for Josh’s pinewood derby car. As we were carving it, we discovered a defect in the wood which we were working around when Josh said “it looks like a bone.” So the bonemobile was born, and we 3D printed a skull to adorn it. Helen finished it off with cool painting:
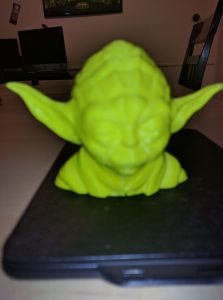
Who could resist Yoda?
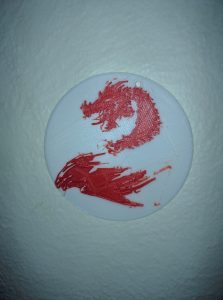
I was experimenting with multi-colored prints, and made this Guild Wars 2 logo for Matthew (it’s his favorite game) by switching from white to red filament mid-print:
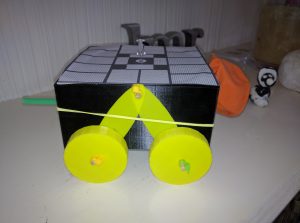
Josh needed to build a model rover for his science class. He had instructions for cutting out a model from foam meat trays, but it looked like just the thing for a 3D printer. Josh learned to use a 3D modeling program (SketchUp), a slicer (Cura), and he transferred the files to the SD card and fired up the printer. The rover is air-powered: you blow up the balloon and it scoots across the table — much faster and farther than I would have guessed:
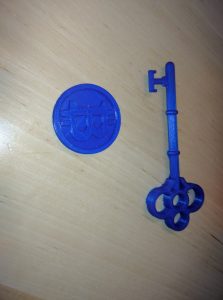
A skeleton key and a bitcoin, just because:
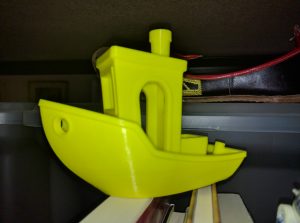
The obligatory Boaty McBoatface (Benchy McBenchface?):
One of the problems with the Monoprice Mini is that the control wheel is tricky to manage. Lo and behold, there are files on Thingiverse for a cool new control knob: looks better and works a treat. There’s also a little tool rack you can print that fits on the top:
I was surprised to find files for custom feet for some shelving units we have:
The real power, though, comes when you learn to create your own models. The first few custom prints I did with SketchUp![]() , largely because I was already familiar with it from doing some architectural models for my office. It isn’t ideal for 3D printing, though. I’ve started using FreeCAD
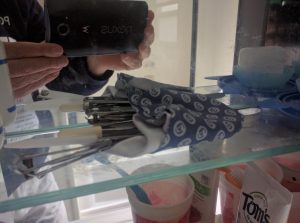
, largely because I was already familiar with it from doing some architectural models for my office. It isn’t ideal for 3D printing, though. I’ve started using FreeCAD![]() which is incredibly powerful though somewhat frustrating, both because if its complexity and flexibility, but also because of some rough edges in its interface. Still, I was able to take the mess in my medicine cabinet:
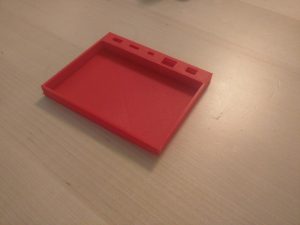
which is incredibly powerful though somewhat frustrating, both because if its complexity and flexibility, but also because of some rough edges in its interface. Still, I was able to take the mess in my medicine cabinet:
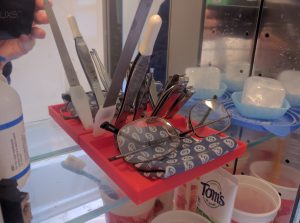
and neaten it up a bit with a custom 3D print:
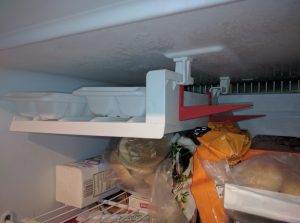
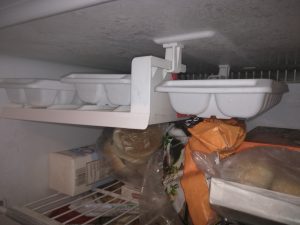
We really need a new refrigerator, but we’re making the 20 year old one last until the budget loosens up. Unfortunately, we’re chronically short of ice. But with a quick print of some supports, we have been able to add an extra tray so our cold drinks will stay cold this summer:
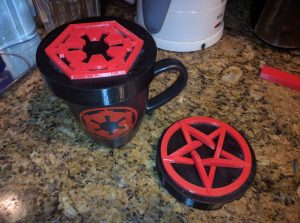
There are dozens of little things I’ve printed: replacements for missing knobs, stops for light dimmers, specialized measuring cups, cable organizers, models of mathematical functions, Raspberry Pi cases, and heat-retaining covers for steeping tea mugs. All in all, I have kept the little machine pretty busy. I have uploaded a few of my models to Thingiverse.
— Ron Risley – 2017-04-22